Introduction
In the previous two blog posts, we’ve explored GGML’s minimal example simple-ctx, discussing memory management in context mode and how GGML constructs a computational graph. Now, it’s time to dive into its final part—how GGML actually performs the computation. Let’s get started!
Note: This blog series is based on commit 475e012.
Creating the Compute Plan (ggml_cplan)

Continuing from the previous post, after analyzing the function build_graph (line 63 in simple-ctx.cpp), we now step into the function ggml_graph_compute_with_ctx, which plays a crucial role in GGML’s execution framework.

Inside, the first thing it does is create a ggml_cplan struct on the stack via a call to ggml_graph_plan. Though the implementation of ggml_graph_plan appears complex, its core purpose is actually pretty simple: it determines key execution parameters for computation:
n_threads: The max number of threads used for graph computation. In our example, this is set to1for simplicity.work_size: The amount of extra temporary memory (in bytes) required for computation. This value varies based on the backend and operators used. In this example,work_size = 0, meaning no extra memory is needed.
Let’s take a closer look at how these values are determined.
Determining Number of Threads and Work Buffer Size

Number of Threads
GGML determines the number of threads using these steps:
- The
n_threadsargument passed toggml_graph_plandefines the upper bound of multithreading. - It iterates over all nodes in
ggml_cgraph.n_nodes(note here we only consider nodes, as leafs don’t involve computation). For each node operator, GGML looks up itspredefined multithreading limit defined inggml_get_n_tasks, which contains a large switch-case structure. - The final thread count is computed as:
final_n_threads = MIN(n_threads, MIN(each node's maximum multithreading count))
Work Buffer Size
Similar to thread count computation, GGML:
- Iterates over all nodes in the computational graph, looks up their operators, and references a backend-specific lookup table (another huge switch-case block) to determine the required work buffer size.
- Computes the final work buffer size as:
final_work_buffer_size = MAX(each node's required work buffer size)

In our example, final_n_threads = 1 and final_work_buffer_size = 0, which are later stored in ggml_cplan. After leaving ggml_graph_plan, we see that the work buffer is also stored in ggml_context, alongside ggml_tensor data and the computational graph.
Graph Computation
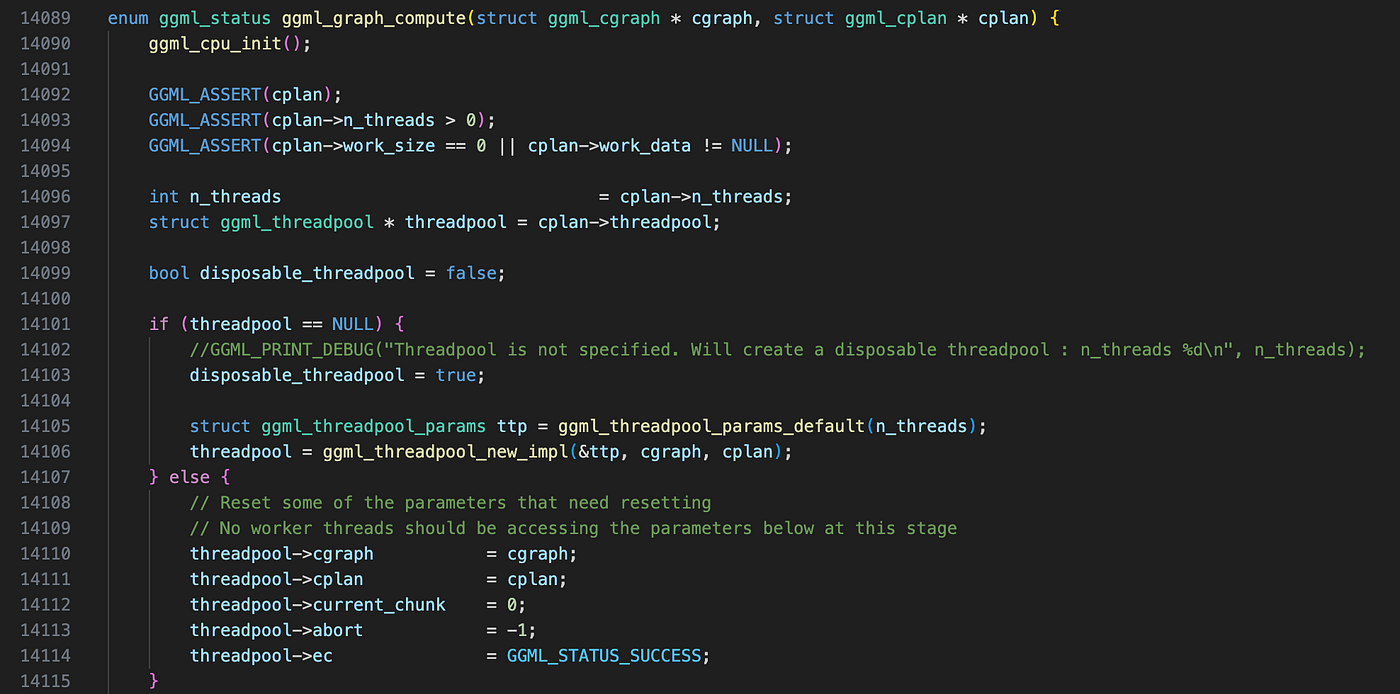
With everything in place — tensor data, a computational graph, and a compute plan — GGML proceeds to execute ggml_graph_compute. Basically, this function does the following things before performing actual computation:
- Preparing lookup tables
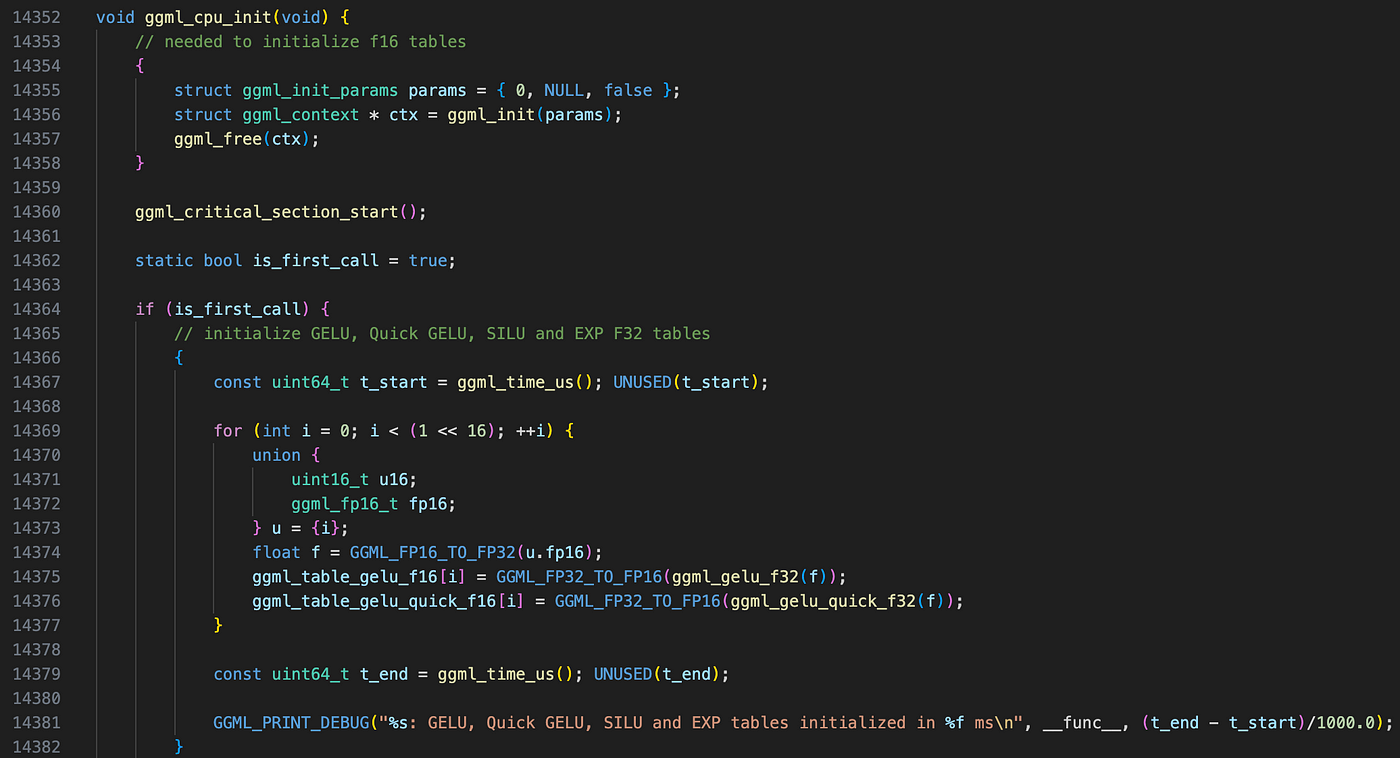
This function initializes several lookup tables that optimize low-level operations, such as:
- Fast type conversions from FP32 to FP16. The implementation here is a bit hacky — it involves calling
ggml_init, immediately allocating a context, and then deallocating it just as quickly. But anyway it works : ) - Precomputed activation function values (e.g., for GELU).
2. Creating a thread pool
GGML comes with its own custom thread pool built on top of pthread—at least on Linux and macOS (haven’t dug into the Windows implementation yet).
This step is a little bit tricky, let’s examine the thread pool initialization in ggml_threadpool_new_impl.
GGML Thread Pool
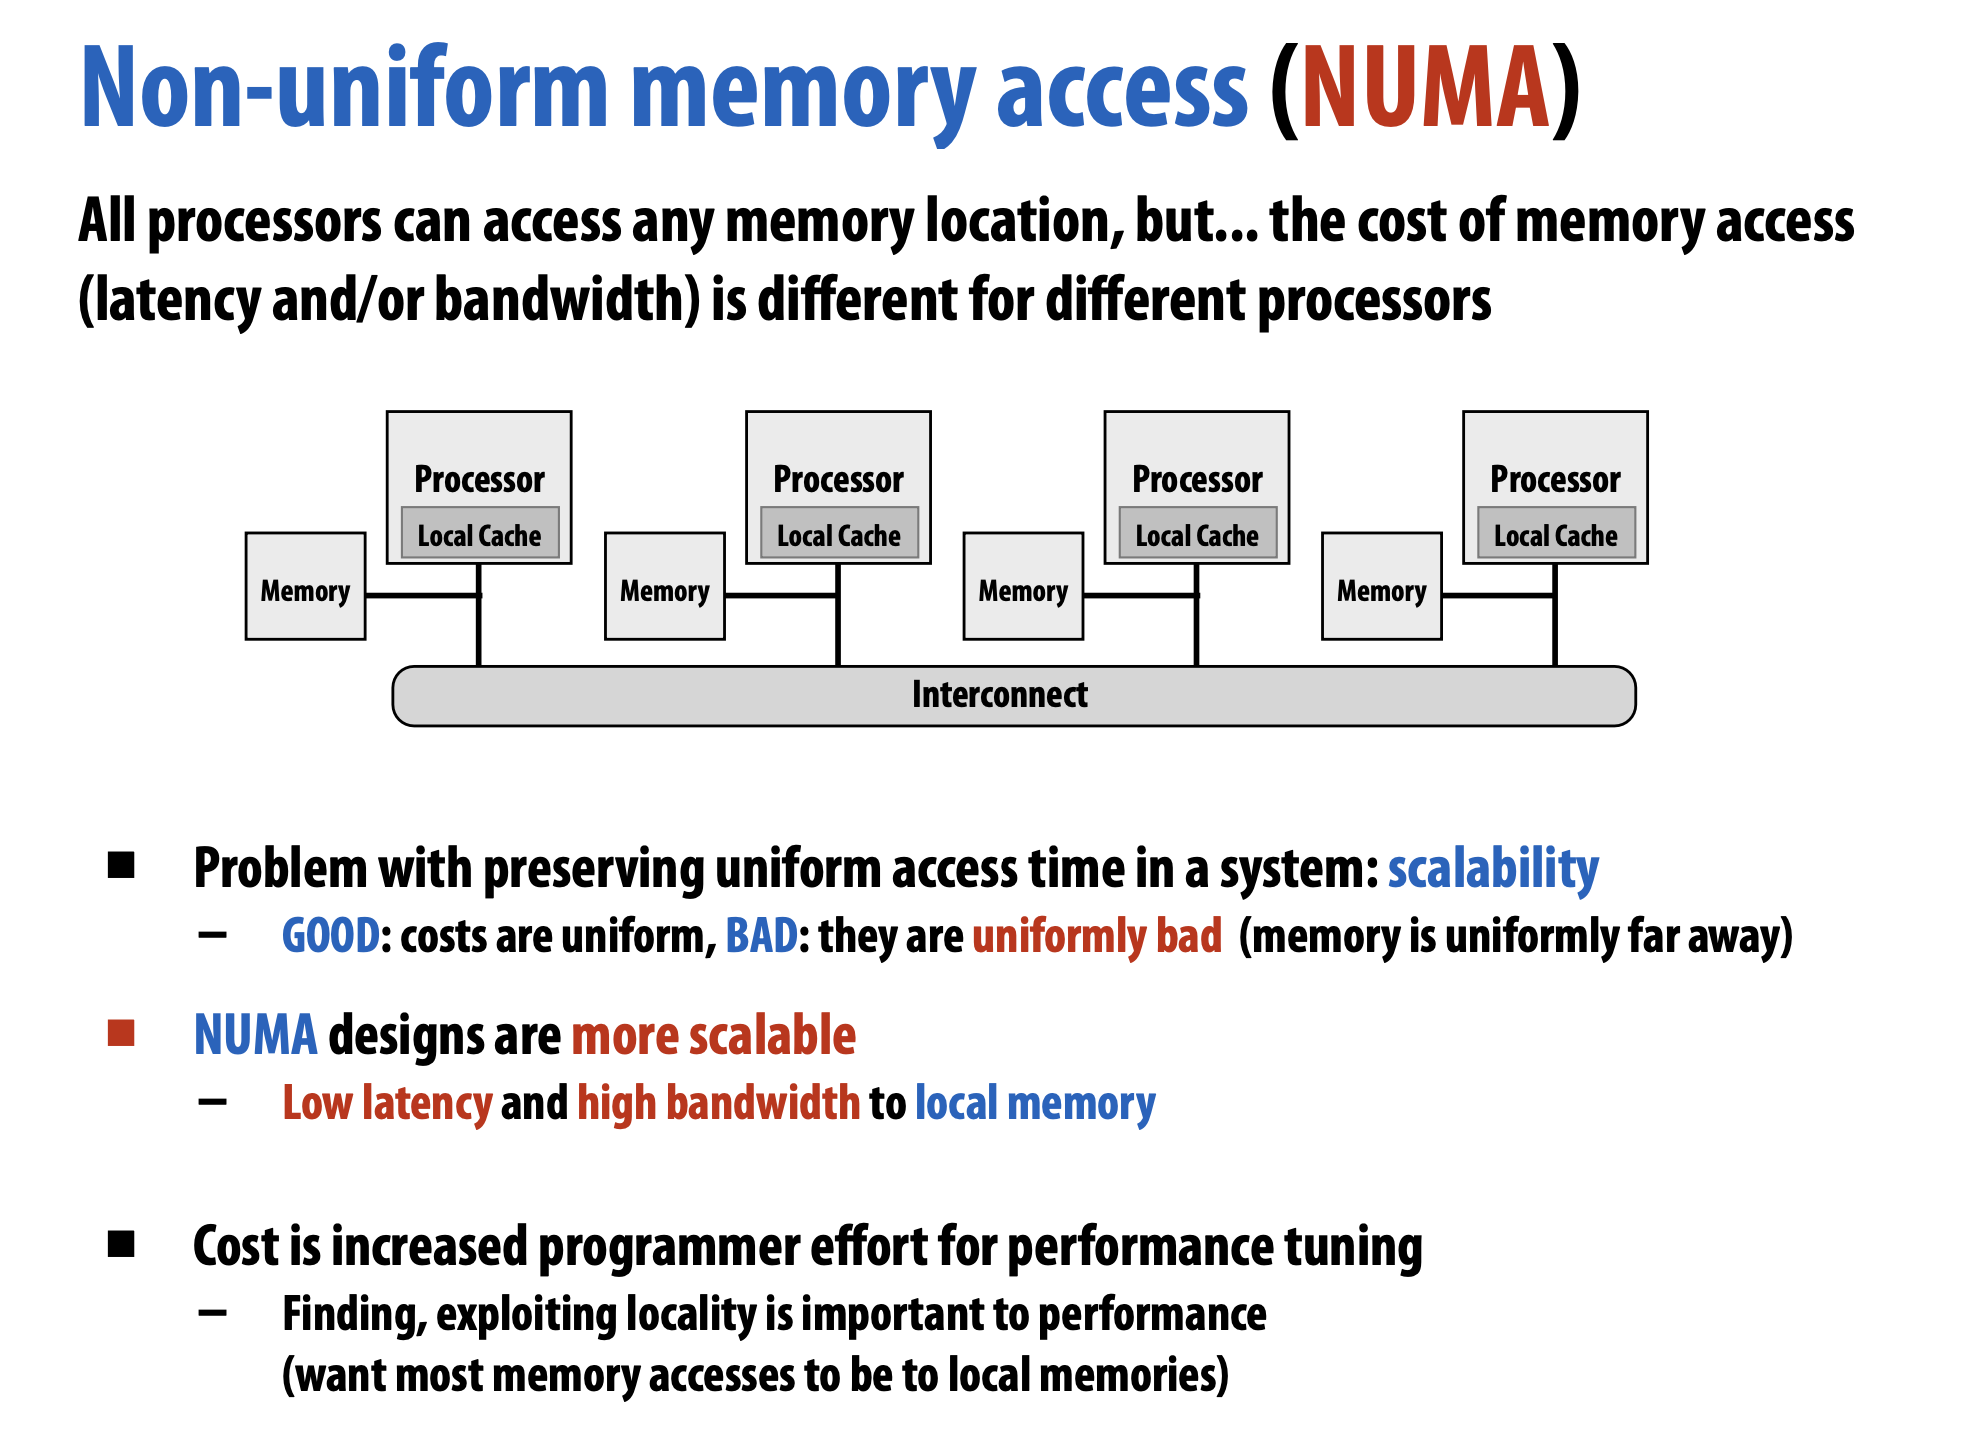
GGML implements a thread pool optimized for running computational graphs efficiently, with optimizations for NUMA architectures. If OpenMP is enabled, thread management is handled automatically, otherwise, GGML manually creates and manages pthreads.
For a simple introduction to NUMA architecture, refer to the following slides from the CMU 15-418 course:
First, let’s look at the part used by both OpenMP and non-OpenMP versions.
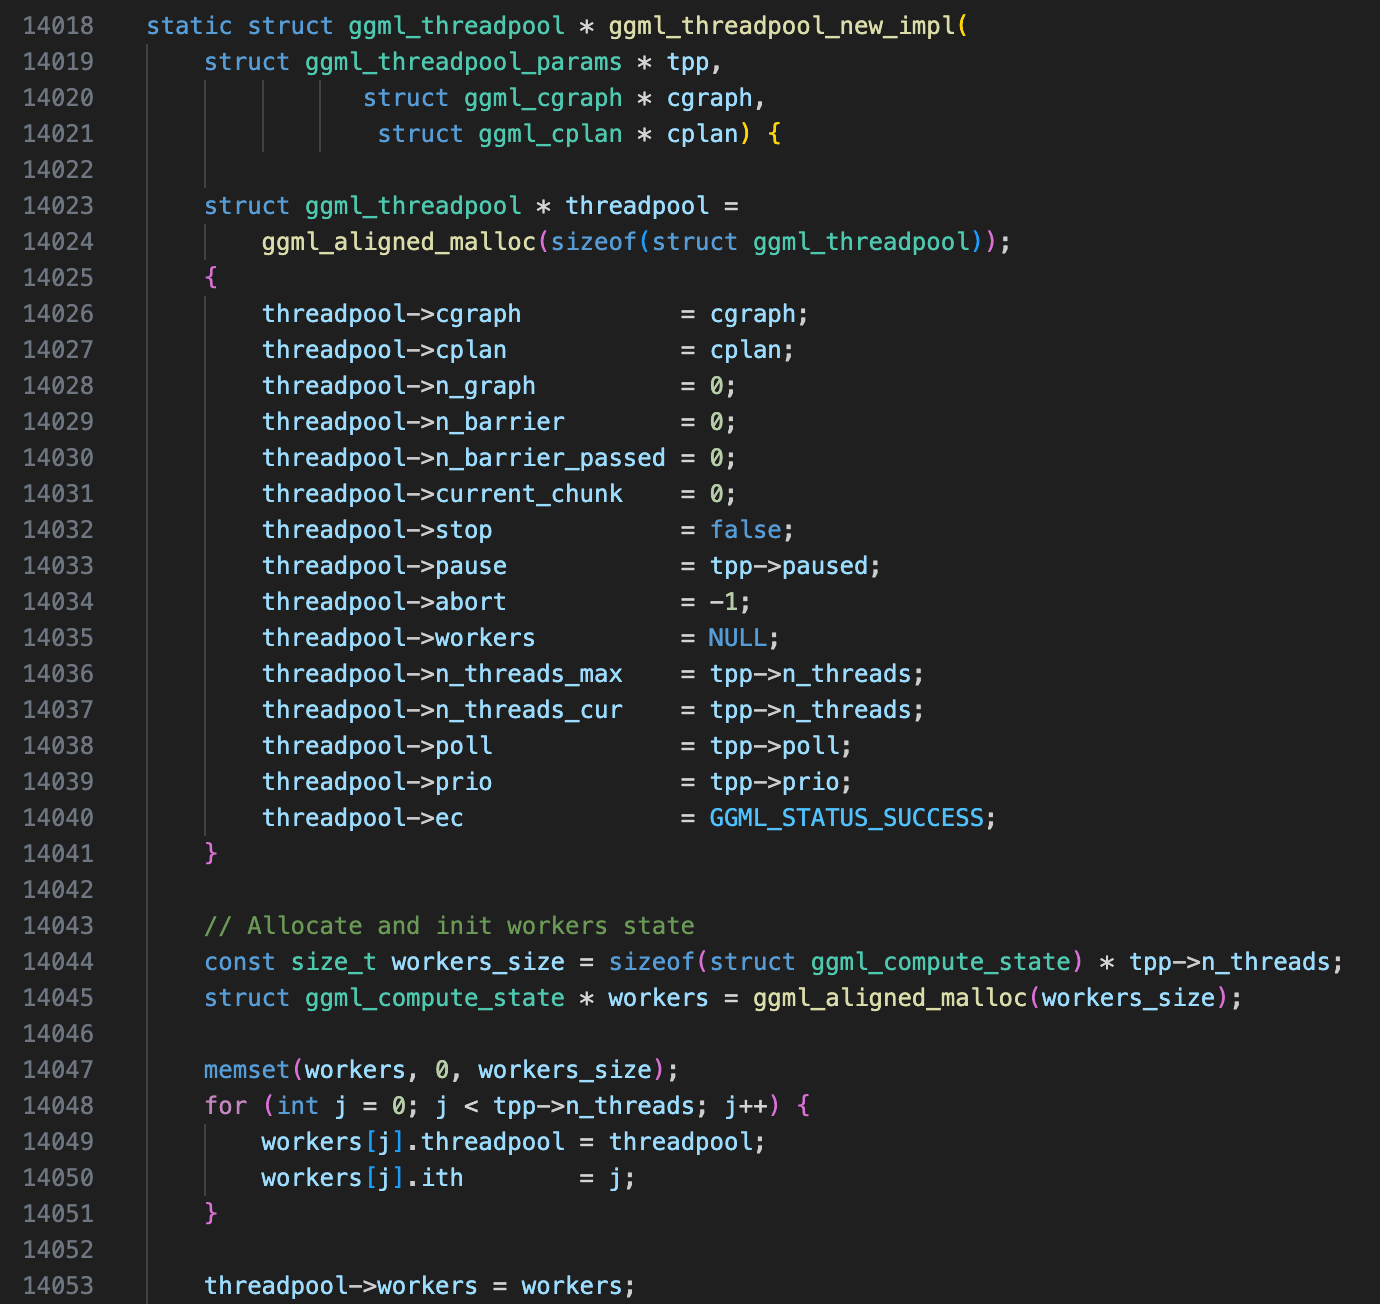
Basically, ggml first initialize a ggml_thread_poolstruct using default parameters, then allocate a state struct for each worker (ggml_compute_state). It contains following fields:
struct ggml_compute_state {
#ifndef GGML_USE_OPENMP
    ggml_thread_t thrd; // Alias for pthread_t
    bool cpumask[GGML_MAX_N_THREADS]; // Affinity mask for NUMA optimization
    int last_graph; // Last computational graph processed
    bool pending; // Indicates if the thread is pending
#endif
    struct ggml_threadpool * threadpool; // Back reference to the thread pool
    int ith; // Thread ID within the thread pool
};
If OpenMP is enabled, the threadpool is fully initialized at this point. If not, GGML performs several additional steps:
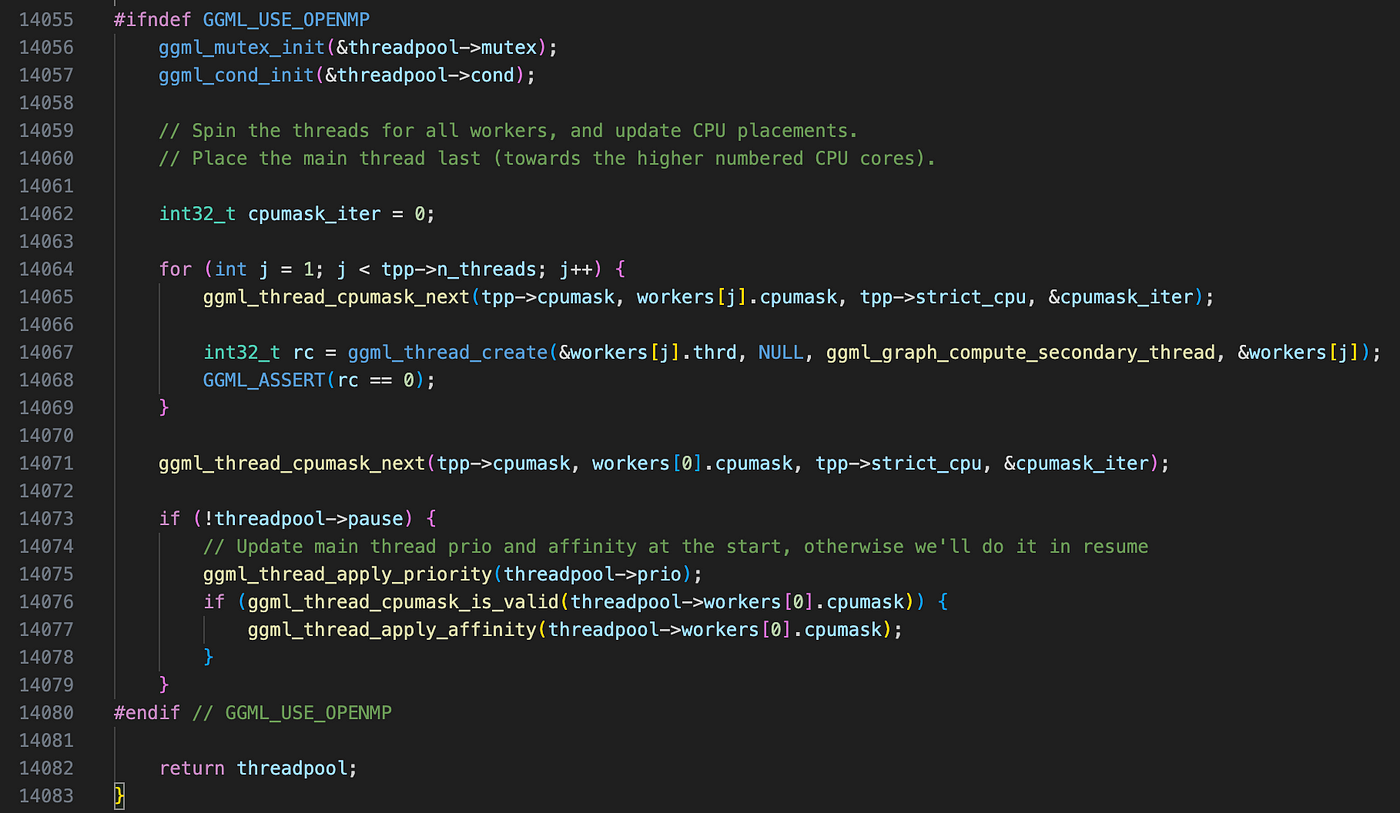
1. Setting CPU Affinity for Each Thread
GGML assigns CPU affinity masks to control which cores each thread can run on. This helps optimize memory access patterns, especially on NUMA architectures, where accessing local memory is faster than remote memory.
CPU affinity is assigned using ggml_thread_cpumask_next(), which determines how CPU cores are distributed among threads based on the strict flag:
- If
strictisfalse: Every thread simply inherits the global CPU mask from the thread pool configuration. In architectures without NUMA (like the Apple’s M3 chip I’m using), this results in all threads being allowed to run on any core. - If
strictistrue: Each thread is assigned a specific core using a round-robin approach. Starting from a given index (*iter), GGML scans through the global CPU mask and assigns the first available core to the thread. If it reaches the end of the mask, it wraps around to the beginning (circular iteration).
This logic ensures that threads are evenly distributed across the available CPU cores, reducing contention.
2. Creating Worker Threads
Once CPU affinities are set, GGML spawns worker threads using ggml_thread_create (which is just an alias for pthread_create()).
Note that the main thread itself is not a worker thread. However, it is also not a pure thread manager — it will participate in computation alongside other worker threads.
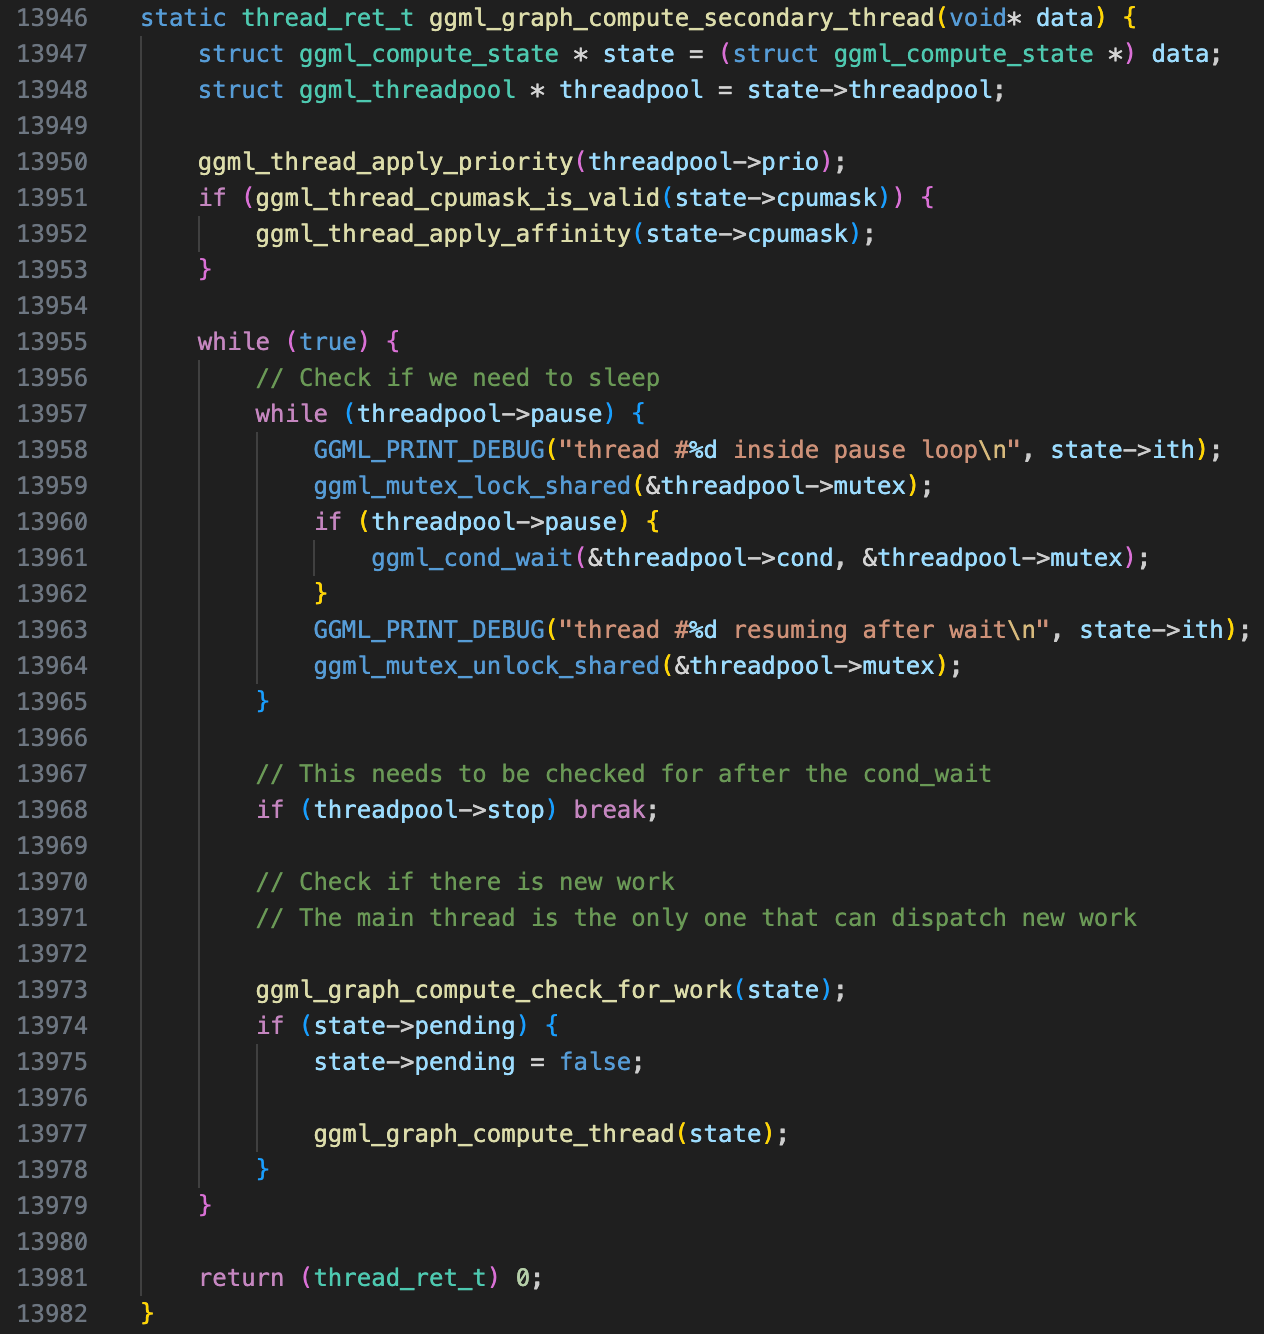
Each worker thread immediately enters a wait state and does not start computing right away. Instead, it sleeps until explicitly signaled by the main thread via a condition variable.
3. Applying Thread Priority and Affinity
After thread creation, the main thread adjusts thread priority and affinity settings using:
ggml_thread_apply_priority(threadpool->prio);
ggml_thread_apply_affinity(threadpool->workers[0].cpumask);
This step ensures that:
- Threads follow the priority policy set in the thread pool.
- Affinity settings take effect on architectures where core assignments matter.
The exact behavior varies across hardware and I won’t go into its detail, you can take a deeper look if you are interested.
Multithreaded Execution: How GGML Computes Tensors on CPU
Now that the thread pool is set up, let’s see how GGML actually executes tensor computations in parallel.
First, let’s see what will happen if OpenMP is not enabled.
1. Main Threads Starts Execution
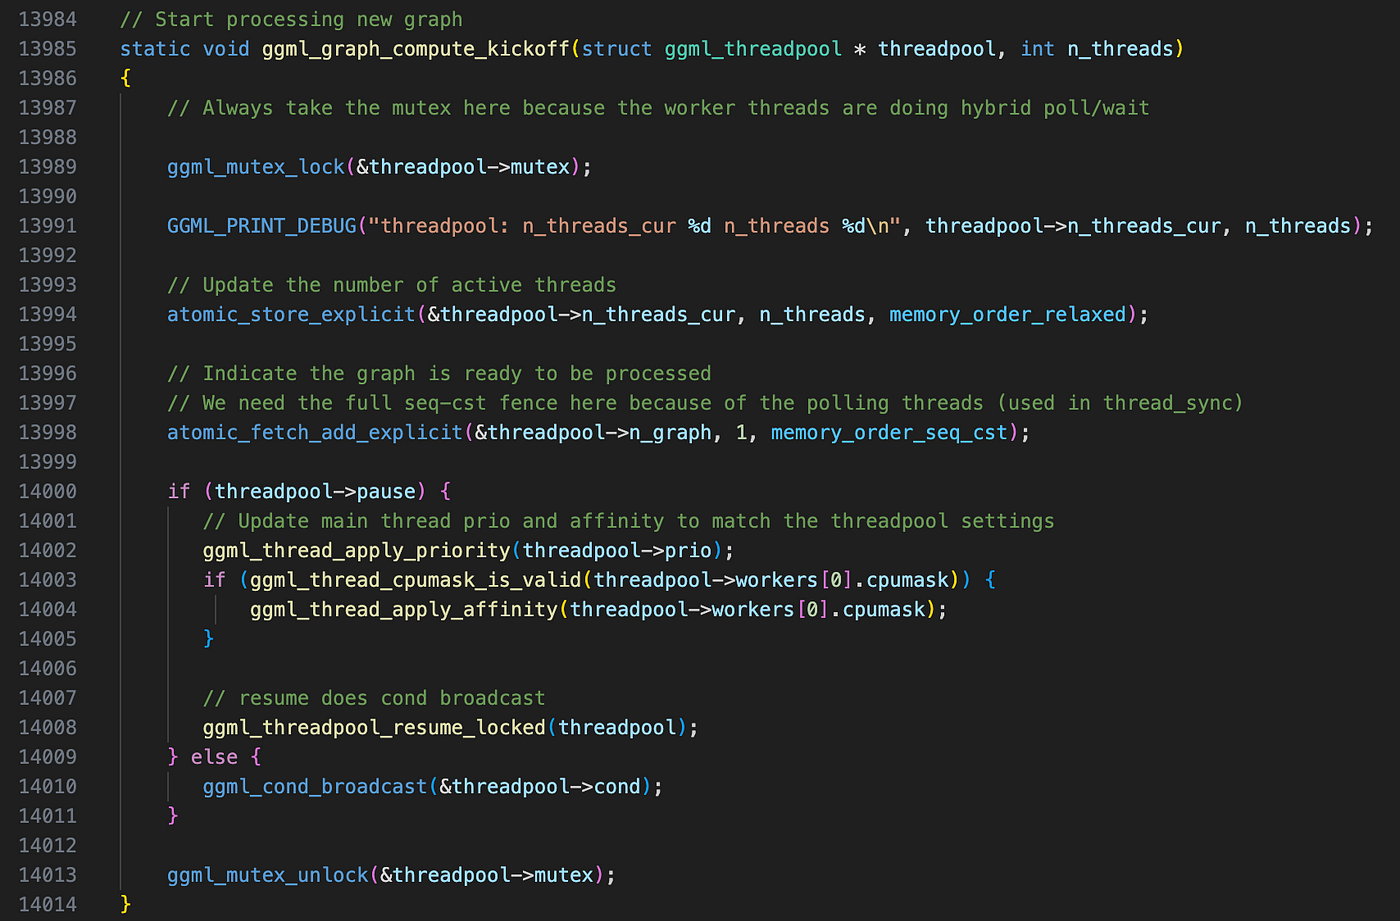
Once the computational graph is ready, ggml_graph_compute_kickoff() wakes up all worker threads by:
- Setting
n_threads_curto indicate the number of active threads. - Marking the next computation graph (
threadpool->n_graph) as ready to be processed. - Calling:
ggml_cond_broadcast(&threadpool->cond);This function wakes up all worker threads.
All these operations are protected by a pthread mutex to prevent race conditions. Even though only the main thread modifies shared state, worker threads are reading those values concurrently, so synchronization is necessary here.
2. Worker Threads’ Main Loop
While the main thread is running, don’t forget we have also created all workers (running ggml_graph_compute_secondary_thread), they are currently stuck in this infinite loop:
while (true) {
    if (threadpool->pause) {
        wait for condition variable threadpool->cond
    }
    if (threadpool->stop) break;  // Exit condition
    wait until new work arrives;
    call `ggml_graph_compute_thread` to do actual computation.
}
Once the condition variable is set by the main thread in ggml_graph_compute_kickoff , all worker threads reaches function ggml_graph_compute_thread , where they can finally do some actual computation.

Remember I’ve mentioned that the main thread also participates in computation? After kicking off the execution, it doesn’t just sit idle — it immediately enters ggml_graph_compute_thread, functioning just like any other worker thread in the pool.
3. How GGML Distributes Work Across Threads
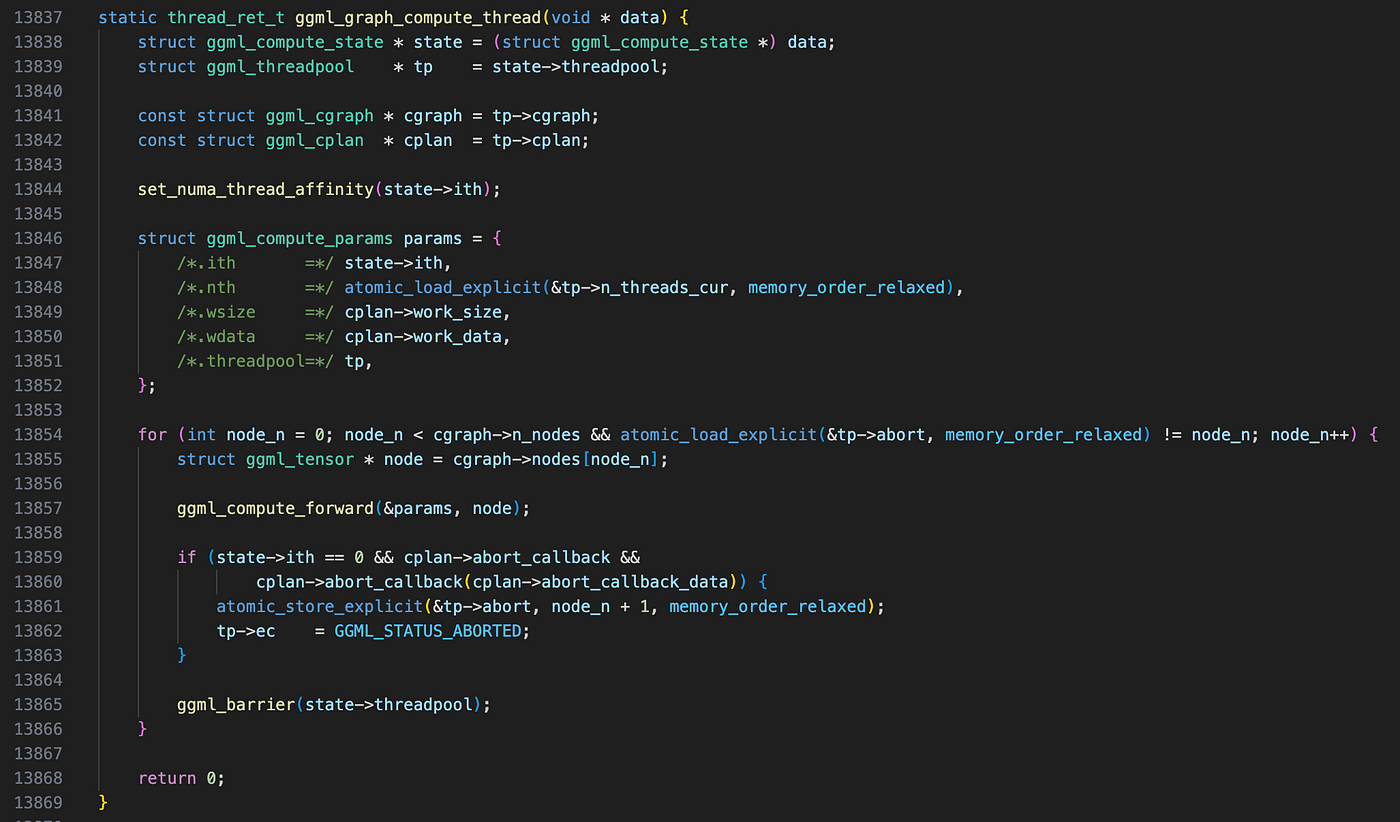
At first glance, this part confused me, because the parallel computation in GGML does not work the way I initially expected. I assumed that since all nodes in ggml_cgraph->nodes are already topologically sorted (as we discussed in the previous post), GGML would follow a more common parallel execution approach: identifying nodes with zero in-degree and computing them in parallel.
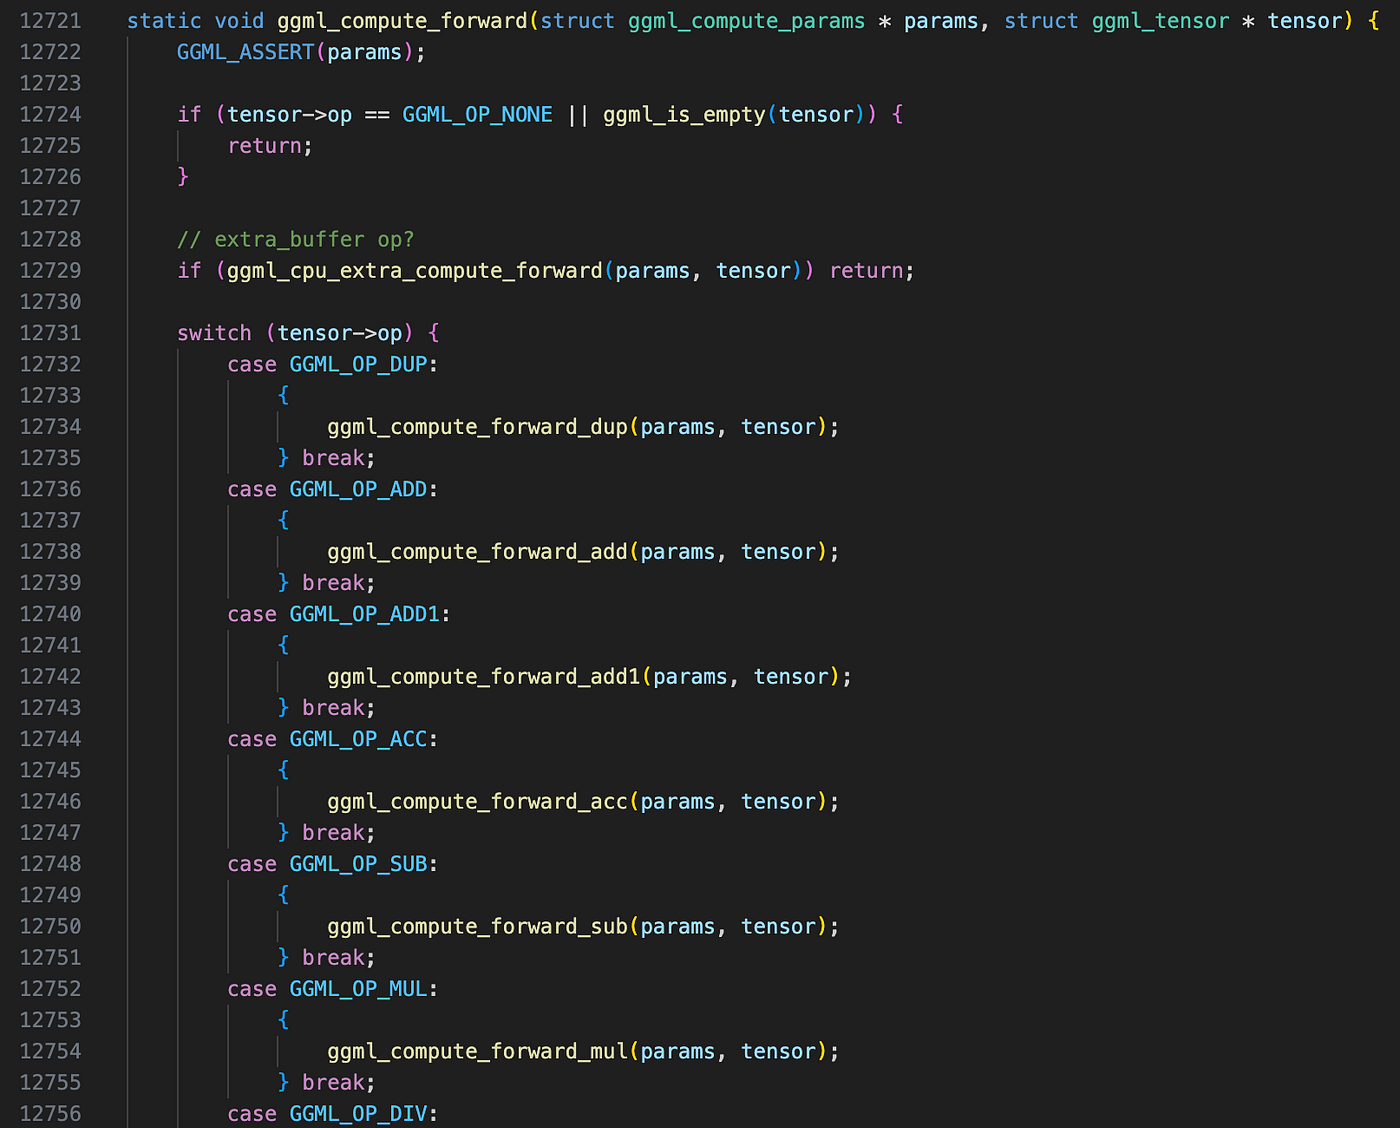
However, that’s not how GGML works. Instead, all threads work on a single node at a time. Let’s take a look at ggml_compute_forward, where the actual computation function is selected based on the node’s operator type. This is handled through a massive switch-case block (yes, it looks a bit ugly, but when you’re dealing with so many operators, it’s an acceptable approach).
For example, in this case, the function invoked is ggml_compute_forward_mul_mat(probably the most important function on any backends) which handles matrix multiplication. I won’t go into the details of how the actual matmul operator leverages both multithreading and SIMD instructions in the implementation— that’s a good topic for a future post. For now, let’s just focus on how a thread gets dispatched step by step to the actual computation function.

Once the computation for a node is finished, all threads synchronize at the barrier ggml_barrier, ensuring they complete the current node before moving on to the next one. This process repeats until all nodes in the graph are evaluated.
4. Workflow when OpenMP is available
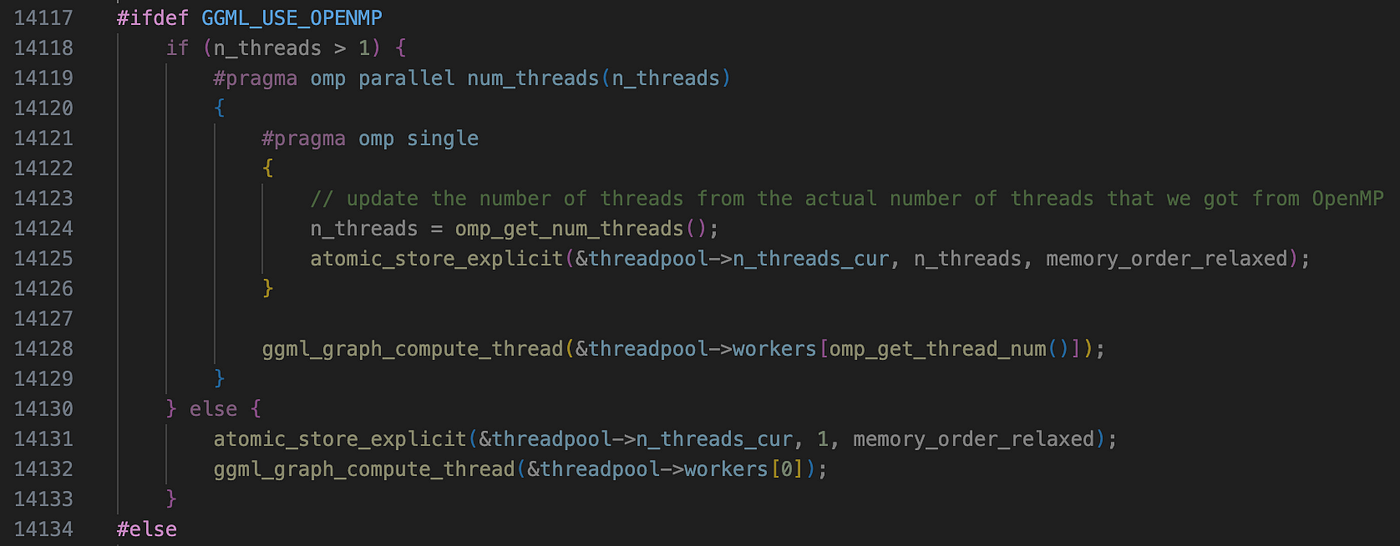
Finally, we’ve gone through all the intricacies of GGML’s multithreading system — but is there a more straightforward way to handle parallel execution?
Yes, and that’s where OpenMP comes in. When OpenMP is enabled, it automatically manages parallel computation, eliminating the need for manually creating and synchronizing threads. Instead of handling thread pools, condition variables, and race conditions ourselves, all we need to do is set the number of threads and let each one execute ggml_graph_compute_thread.
No extra manual work, no complex thread management — just simple, efficient parallelism : )
If you are not familiar with OpenMP, here’s a quick tutorial.
Final Steps
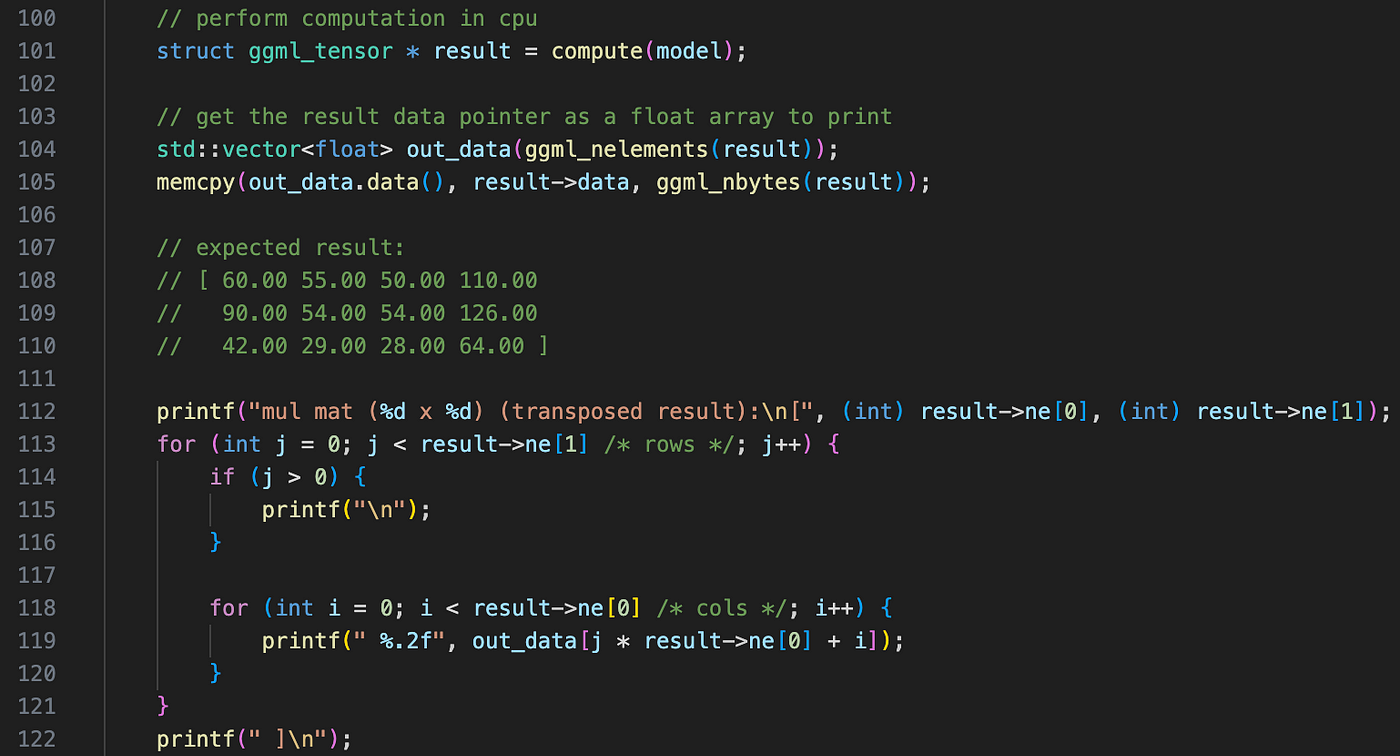
After all nodes are computed, GGML returns the result tensor (matmul result in this case) to the main function (simple-ctx.cpp line 101). The remaining part is trivial, it just copies and prints the result tensor to the console.
Wrapping Up
Finally, we have finished the simple-ctx example, congrats! Now we’ve fully explored GGML’s complete execution flow in context mode. In the following posts, we’ll analyze more complex examples like simple-backend and mnist , which introduce two key differences:
- It reads and parses GGUF, GGML’s model file format.
- It stores tensor data in “backends” rather than in
ggml_context.
Stay tuned for the next update!
